

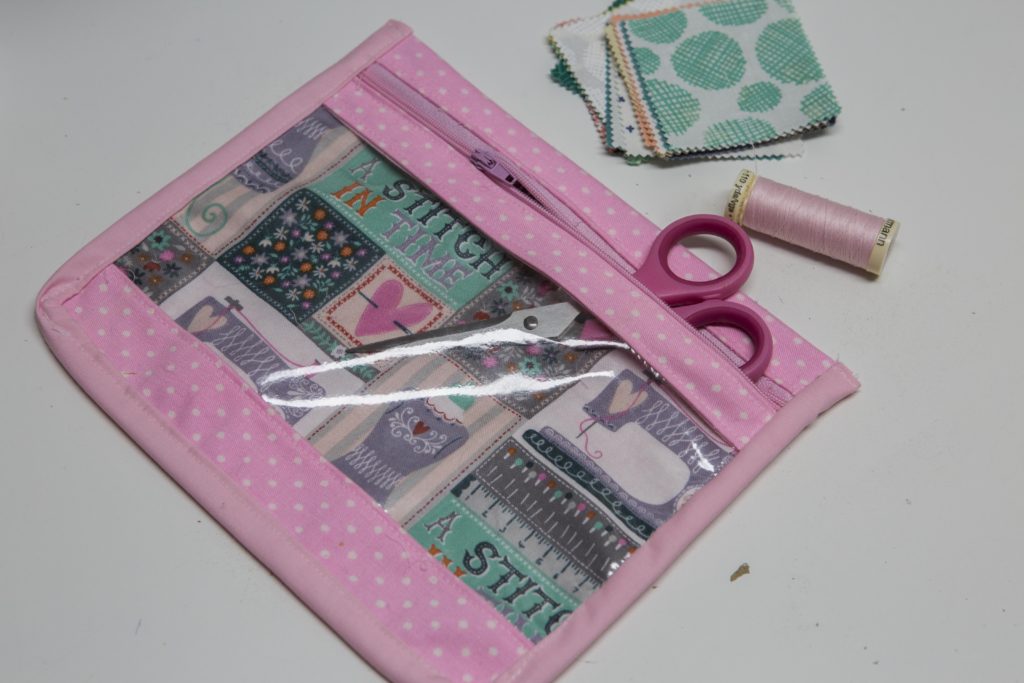
Welcome to the Vinyl Window Zipper pouch tutorial!! Here you will find the measurements, products i use, and a link to the Video tutorial
Things you will need
Cotton Fabric
Zipper
Bias Tape (purchased or home made)
Measurements
Vinyl – 8 1/2″ x 4″ – Cut 1
Cotton back piece – 8 1/2″ x 8″ – Cut 1
Cotton lining piece – 8 1/2″ x 8″ – Cut 1
Cotton – 1 1/2″ x 8 1/2″ – Cut 2
Cotton – 1 1/4″ x 8 1/2″ – Cut 2
Zippper – 8 1/2″ or longer
Bias tape – 23ish inches or so
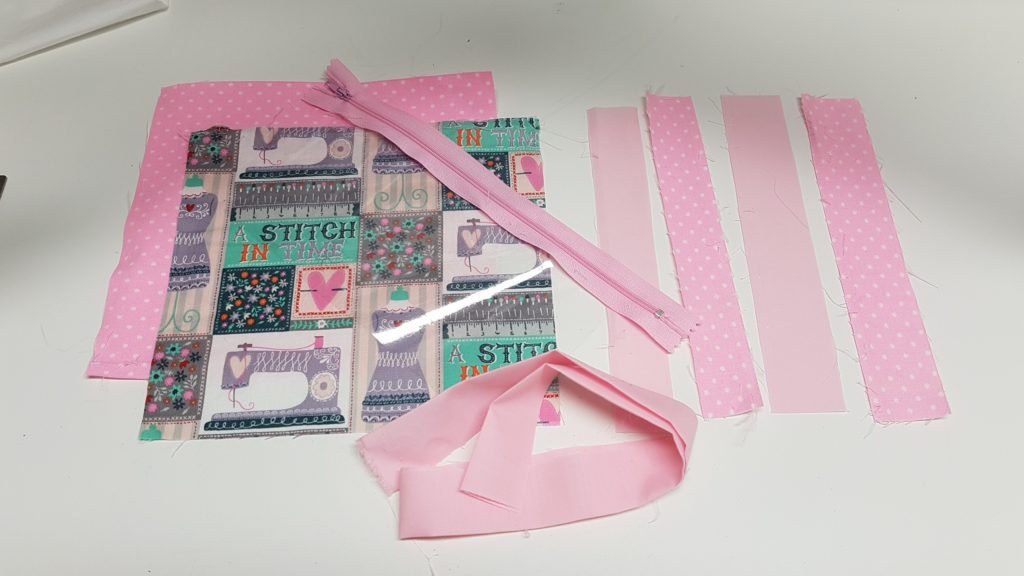
(the vinyl is in the photo … its the shiny piece lol you can barely see) #seethrough
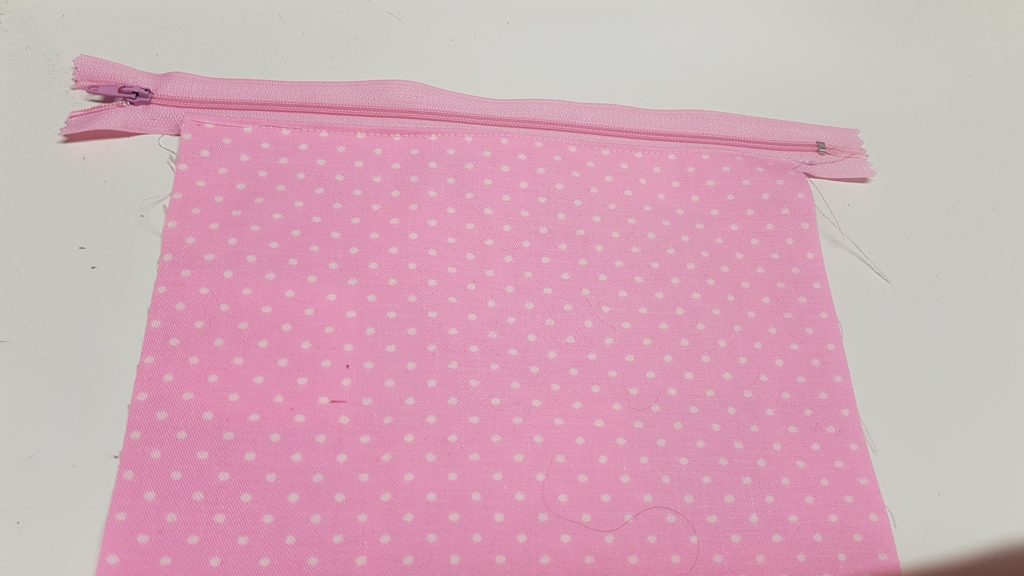
Step 1: Take 2 large pieces and place them right sides together with the zipper lined up with the 8 1/2″ side, make sure zipper pull is facing your outer fabric, sew along that edge
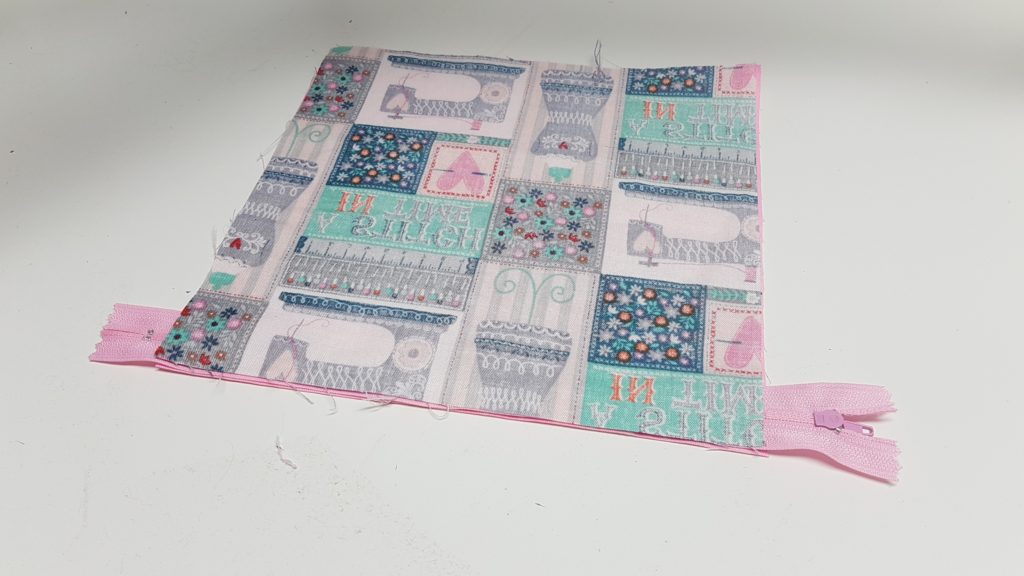
Step 2: flip the fabric right sides out and top stitch along near the teeth of the zipper with a 1/8″ seam allowance
My Polkadot Fabric is my outter fabric, the sewing print will be on the inside peaking through the vinyl window
Step 3: Now we will prepare the vinyl window panel
- I really love this method because it can be a little tricky working with vinyl, in this tutorial you dont even sew directly onto the vinyl which can cause a ton of headaches
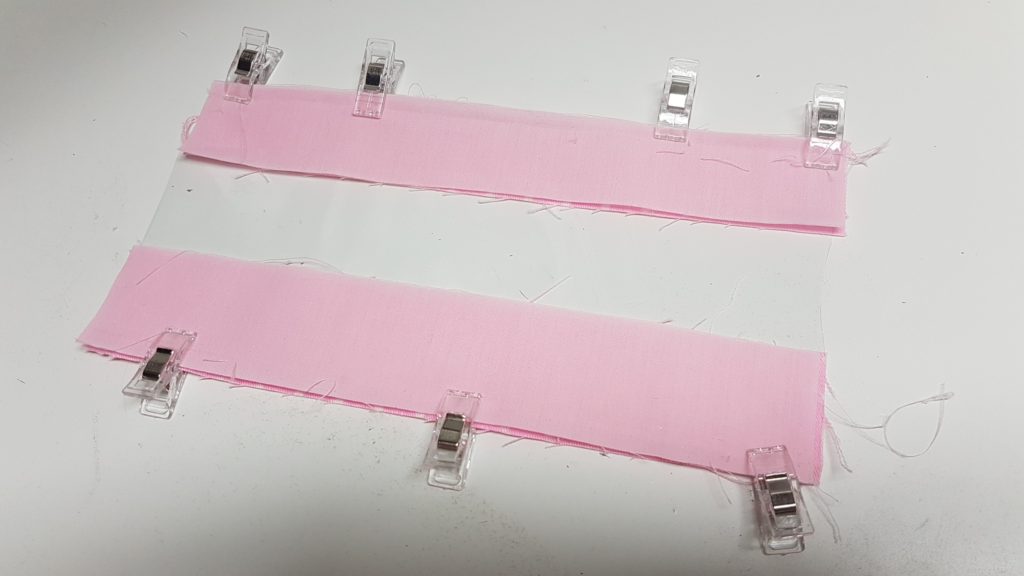
Sandwich the two 1 1/2″ pieces with one side of the vinyl
sandwich the other two 1 1/4″ pieces on the opposite side, clip those into place
**Protip, using Pin can cause little puncture holes that c ould turn into future tears so refrain from using pins when possible. These Sewing Clips work perfect
Sew along both sides
Step 4: Flip the fabrics right sides out and do a top stitch to flatten the pieces with a 1/8th of an inch seam allowance
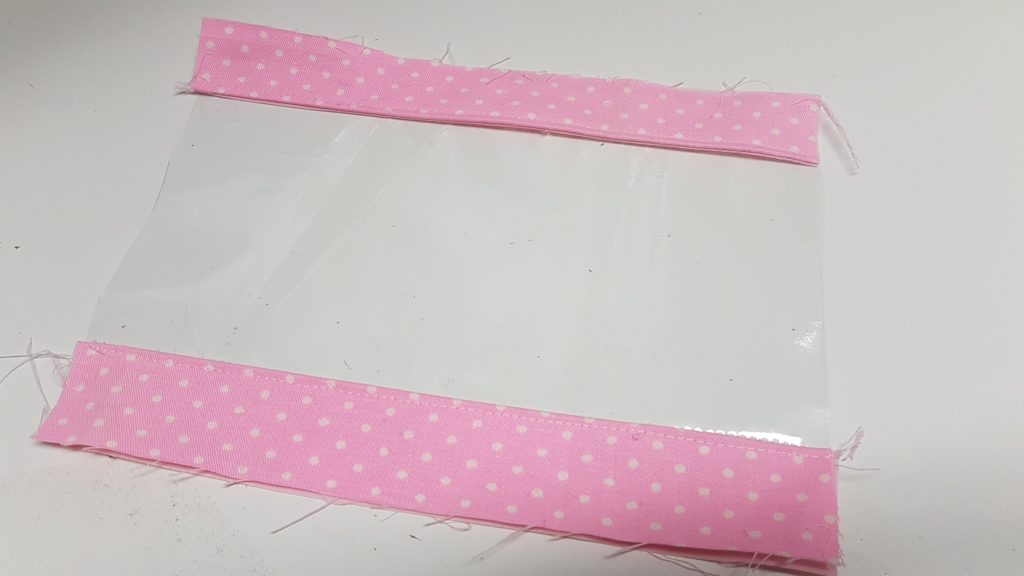
This is your completed panel!
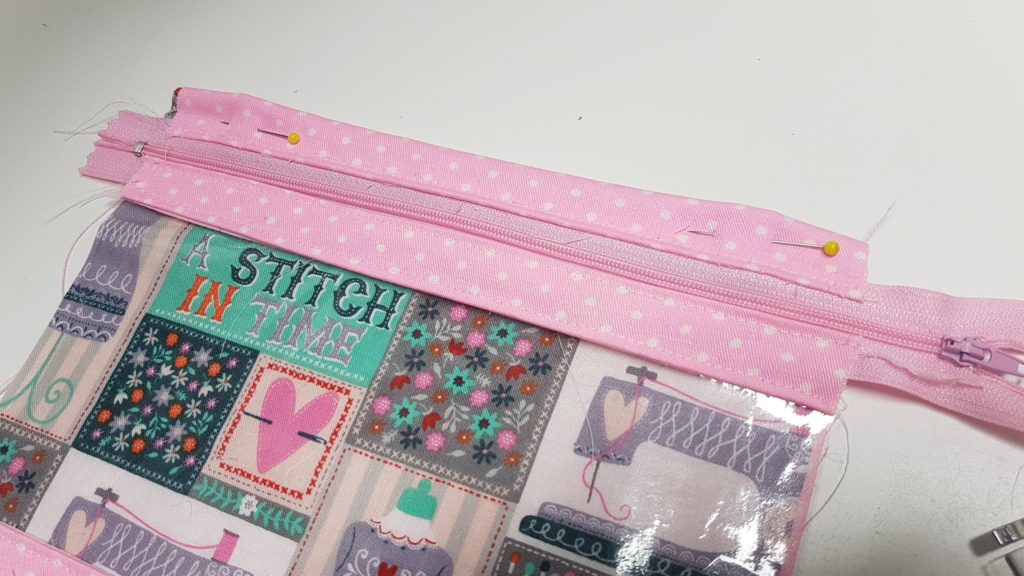
Step 5: Fold in the raw edges to the top portion of your window panel 1/4″ (The top would be the end with the 1 1/4″ piece)
Iron the hem in that piece.
Fold over the back piece about 3/4″ so the zipper is flat ontop of your lining fabric, tuck the otherside of the zipper into that piece you folded in the raw edges, you will do a top stitch along your zipper to secure your window panel to the bag.
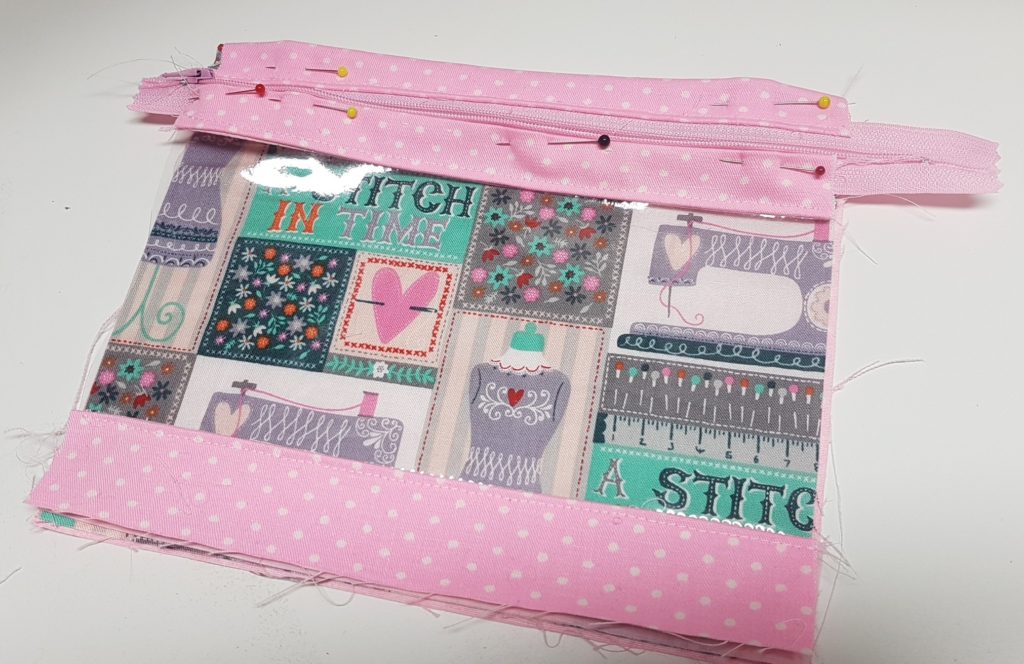
It is helpful to place pins the top of your bags to keep things nice and straight
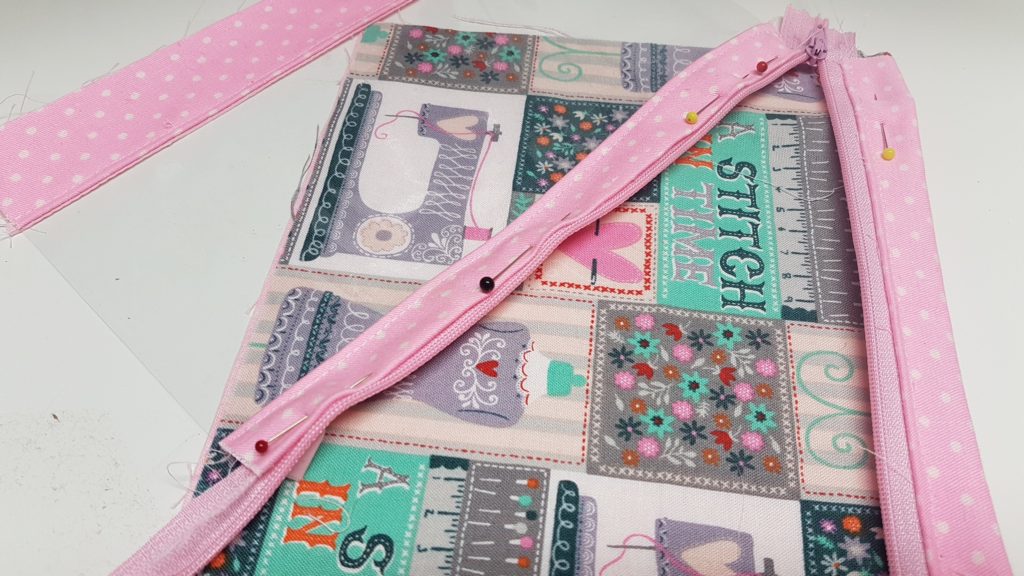
Step 6: Now to place our bias binding around the 3 raw sides, Fold over the short side 1/2″ to hem each end, line up the raw edges of your bias tape with the raw edges of your bag, as you sew your bag remember to unzip your zipper so you dont end up cutting the zipper pull off.
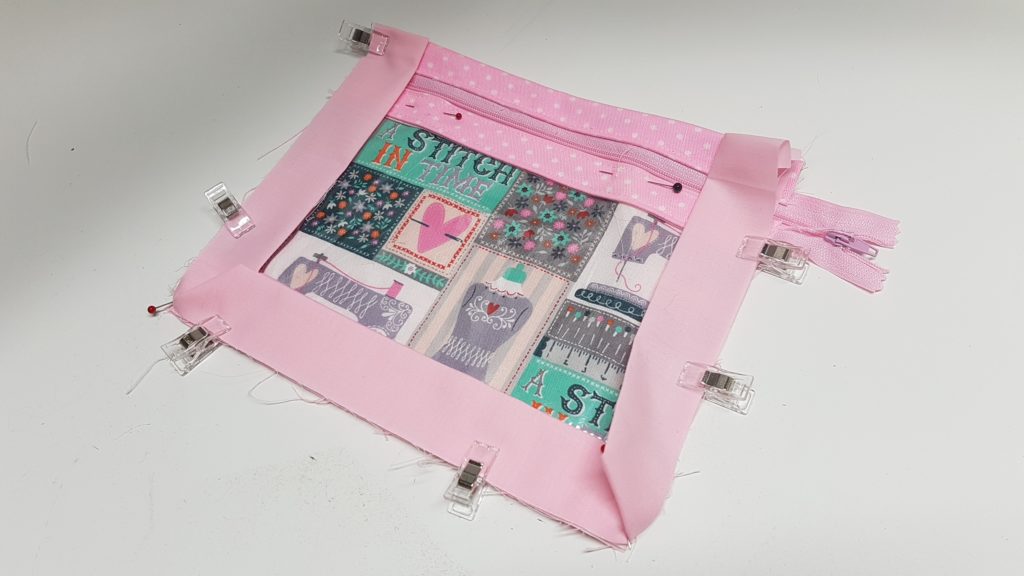
Step 7: Fold over your bias tape and sew down the folded edge **Trim your seam allowance and your corners if you need to so your bias binding can wrap around better


0 Comments